The Ancient Art of Wood Inlay: A Beginner's Guide to Stunning Results
Curiosities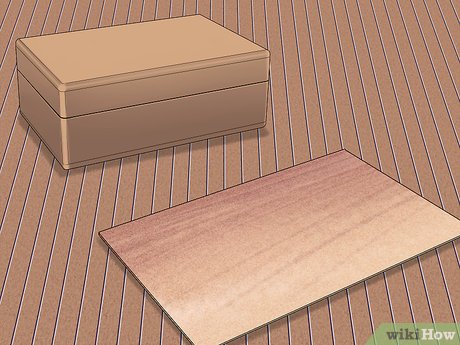
Wood inlay is one of those crafts that looks impossibly complex but is surprisingly approachable once you understand the basics. Whether you want to personalize a guitar neck, dress up a plain jewelry box, or just try something new on a practice block, inlaying adds a level of artistry that’s genuinely hard to beat. Let’s break it down.
Choosing Your Materials
The foundation of any great inlay project is a smart pairing of materials. Your base is typically a wooden object - furniture, a small box, even a beginner block. For the inlay itself, the world is your oyster. Wood veneer is a classic choice. But mother of pearl, bone, and ivory are also popular among craftspeople who want that extra visual pop. The key is keeping the inlay material thin and flat. Thickness will only cause headaches later.
Once you’ve selected your materials, cut the inlay into a simple shape. Don’t overcomplicate it at first. Clean geometric forms are your best friend when you’re starting out.
Tracing and Cutting with Precision
Here’s where patience pays off. Temporarily attach your inlay piece to the wooden base using double-sided tape or a slow-setting tacky glue - this keeps everything stable while you trace the outline with a pencil. A critical tip: when in doubt, trace slightly smaller rather than larger. A tight fit is the goal.
Next, use a sharp X-Acto knife or hobby knife to carefully cut along those traced lines. Go gradually. Once the edges are established, remove the inlay and hollow out the recess beneath. Don’t go too deep - just enough for the piece to sit flush. Sand the recessed area smooth with a small piece of sandpaper, then test the fit. If it’s snug, great. If it needs a little persuasion, a gentle tap with a tool handle after applying glue will do the trick.
The Glue-Up Trick You Didn’t Know You Needed
Here’s a pro move that makes a real difference. Mix the sawdust you’ve generated from cutting directly into your glue. This simple trick disguises any small gaps, blending them visually with the surrounding wood. It sounds almost too easy, but the results are genuinely impressive.
Apply glue generously to both the recess and the bottom of your inlay piece, press them together, and tap down gently. Clean off excess glue - but leave anything sitting in the gap between the two pieces. Once dry, sand down any raised edges until everything is perfectly flush.
Taking It Further: Complex Multi-Piece Designs
Ready to level up? Complex inlay patterns require a bit more planning but follow the same core principles. Start by sketching your design on tracing paper - you can trace from a reference image on your monitor or draw freehand. Make multiple copies. Each segment of your design gets cut from its own separate sheet, which ensures pieces stay the correct size. Keep one untouched master sheet.
Using carbon paper, transfer the master design onto your wood base. Number each paper segment and the corresponding area on the master, working from background elements to foreground. For extra precision, consider creating a medium-density fiberboard (MDF) template using a table saw or jigsaw - it ensures every cut is clean and repeatable.
Cut each inlay segment individually, smooth the edges with sandpaper or a file, and temporarily attach each piece with double-sided tape. Score around each one lightly with a utility knife, deepen the groove, then carefully remove the piece before committing to the final glue-up.
Why It’s Worth the Effort
Wood inlay rewards patience. Start simple, respect the process, and the results will genuinely surprise you. There’s something deeply satisfying about pressing that final piece flush and stepping back to admire the work. Give it a try - you might just get hooked.