Transform Your Porch Into a Bug-Free Oasis: A Complete Screening Guide
Home & Living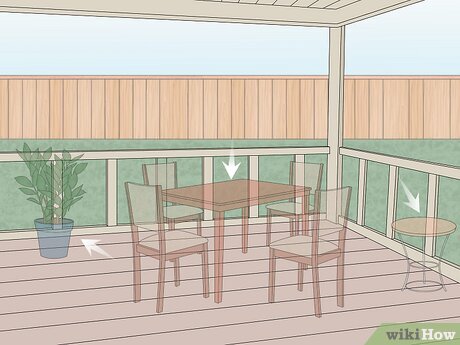
A screened porch changes everything. It’s the difference between swatting mosquitoes all evening and actually enjoying the outdoors in peace. The good news? Screening a porch is a totally achievable DIY project - and the result is one of the most satisfying home upgrades you can make.
Start With a Clean Slate
Before a single nail goes in, clear everything off the porch. Move the furniture, relocate the plants, and give both the floor and ceiling a thorough clean. This isn’t just busywork. A clear, clean space lets you spot any problem areas - rotting wood, uneven surfaces, structural quirks - before they become mid-project headaches. While you’re at it, this is the perfect moment to install any ceiling fans or light fixtures you’ve been dreaming about. Wiring needs to go in before any ceiling panels, so don’t skip this step.
Building the Frame: The Backbone of Your Project
Now for the real work. Using a hammer and pry bar, remove any old wooden battens attached to the existing porch frame. Then it’s time to build your sill plate perimeter - these are the pressure-treated 2x4 lengths that run horizontally along the floor and ceiling, creating the foundation your screen frame will sit on. Use a framing square to make sure every corner is crisp and true. Once the sill plates are in place, add a second layer of untreated wood on top. This gives you a cleaner, more polished base for the interior trim later on.
Next come the wall studs - the vertical heavyweights of the frame. Nail them into wooden structures, or use masonry screws if you’re working with brick. Here’s a tip that saves serious frustration: space your studs three feet apart, measured from center to center. Most standard screens are three feet wide, so this simple trick means your cuts will be clean and minimal.
Finish the frame by positioning your balusters and rails - the horizontal stabilizers that tie everything together. Take your time with a measuring tape, chalk line, and level. Getting these right means a frame that’s sturdy, straight, and professional-looking.
Hanging the Screens
This is the moment it all comes together. Cut your screening material to fit each opening, leaving a little extra on each side - a small buffer that gives you room to work without panic. Starting at the top center of each opening, secure the screen with a staple gun, then work outward toward the edges, smoothing as you go. Keep it taut. Wrinkles are the enemy here.
Once everything is stapled, trim the excess with a utility knife for a neat edge. Then cover those staple lines with wood strips - this hides the hardware and gives the whole thing a finished, intentional look. Using wood screws instead of nails for these strips is a smart move; it makes future screen replacements much easier.
The Finishing Touches That Make It Feel Like Home
Don’t underestimate the power of paint or stain. A fresh coat on all the new wood - matched to your home’s existing color scheme - elevates the entire project from “DIY addition” to “original feature.” It’s a small step with a big visual payoff.
Once the paint dries, sweep up, bring back the furniture and plants, and step back. You’ve just built yourself an outdoor room. A place where summer evenings last longer, mornings feel calmer, and the bugs stay firmly on the other side of the screen. Enjoy every single minute of it.