The Art of Wood Inlay: How to Add Stunning Detail to Any Wooden Surface
Curiosities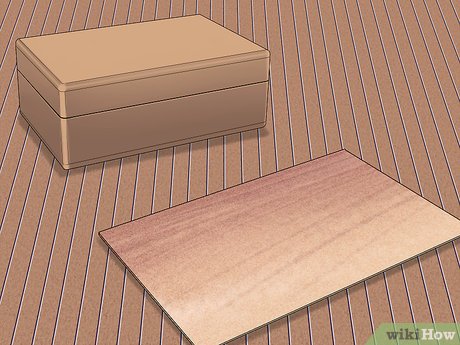
Wood inlay is one of those ancient crafts that looks impossibly impressive but is surprisingly approachable once you know the basics. Whether you want to personalize a jewelry box, add a decorative touch to a guitar neck, or simply try something new with your hands, inlaying wood is a deeply satisfying skill that connects you to centuries of artisan tradition.
Choosing Your Materials
The first decision is picking your base — this is the wooden object you’ll be decorating. It could be a furniture piece, a small wooden box, or even a practice block if you’re just getting started (which, honestly, is a great idea). For the inlay material itself, you have wonderful options beyond just wood veneer: mother of pearl, bone, and even certain types of stone can create breathtaking contrast. Thin, flat, and workable are the key qualities you’re looking for.
Planning and Tracing Your Design
Before any cutting happens, spend quality time on your design. If you’re creating a complex pattern, place translucent tracing paper over a reference image on your monitor or from an art book. Make multiple copies — each individual piece of your inlay should be cut from its own separate sheet. This prevents the sizing errors that come from cutting multiple pieces from a single trace. Number every segment on both the cutouts and a master reference sheet, and plan to work from background elements forward.
Once your design is ready, use carbon paper to transfer it cleanly onto your wooden base. Precision here saves you a lot of headaches later.
Cutting the Recess
This is where patience becomes your best tool. Temporarily secure your inlay piece to the base using double-sided tape or slow-setting tacky glue, then carefully trace its outline with a pencil. Always err toward making the traced area slightly smaller rather than larger — a snug fit is exactly what you want.
Using a sharp hobby knife or X-Acto knife, cut gradually along the traced lines to establish a clean edge. Then remove the inlay and carefully deepen the recess, being mindful not to cut too deep. Finish by smoothing the recessed area with fine sandpaper until it’s flat and even. For more complex or repeated patterns, consider creating a medium-density fiberboard (MDF) template first — it helps you achieve consistent, precise cuts every single time.
Fitting and Gluing
Here’s a satisfying little trick: mix the fine sawdust you’ve accumulated directly into your wood glue before applying it. This creates a natural filler that blends seamlessly into any tiny gaps between materials, making the finished piece look like it was always there. Apply the glue mixture generously to both the recess and the bottom of the inlay, press the pieces together, and use the handle of a tool to gently tap the inlay flush with the surface.
The Finishing Touch
Once the glue sets, wipe away any excess — but leave the glue that’s settled into the gap between materials, as that’s your seamless filler doing its job. If the inlay sits even slightly proud of the surface, sand it down carefully until it’s perfectly flush. Run your fingers across it. When you can barely feel the seam, you’ve nailed it.
Wood inlay rewards slow, deliberate work. The first project might take longer than expected, but the moment you hold a finished piece with a gleaming inlay catching the light, you’ll understand completely why craftspeople have been doing this for thousands of years.